DNS (Domain Name System) is the core component of network infrastructure. The DNS service resolves hostname into ip address and vice versa.For example if we type www.google.com in browser, the DNS server translates the domain name into its corresponding ip address. So it makes us easy to remember the domain names instead of its ip address.
Package- bind*Port- 53Daemon- named Script- /etc/init.d/namedConfigfile- /etc/named.conf /etc/named.rfc1912.zones
* BIND stands for Berkley Internet Naming Daemon.BIND is the most common program used for maintaining a name server on Linux.
1- Caching Only DNS Server2- Master DNS Server3- Slave DNS Server
Note-- Caching Only DNS Server:
- Hostname: server.ashu.com
- IP: 192.168.0.1
- Master DNS Server:
- Hostname: server.ashu.com
- IP: 192.168.0.1
- Slave DNS Server:
- Hostname: slave.ashu.com
- IP: 192.168.0.2
System-11- Configure Caching Only DNS Server-
A caching-only name server maintains a cache of resolved domain name-to-IP address mapping. The caching-only server does not have control over any specific zone, but it communicates with other master servers in resolving the IP addresses.
Step-1 Set Static IP..[root@server ~]# vim /etc/sysconfig/netwprk-scripts/ifcfg-eth0
DEVICE=eth0HWADDR=40:2c:29:84:6d:8cNM_CONTROLLED=noONBOOT=yesIPADDR=192.168.0.1BOOTPROTO=noneNETMASK=255.255.255.0DNS=192.168.0.1 BROADCAST=210.207.201.255 TYPE=EthernetIPV6INIT=noUSERCTL=no
[root@server ~]# /etc/init.d/NetworkManager restart[root@server ~]# ifconfig eth0
eth0 Link encap:Ethernet HWaddr 40:2c:29:84:6d:8c inet addr:192.168.0.1 Bcast:210.207.201.255 Mask:255.255.255.0 inet6 addr: fe80::7627:eaff:fe0d:b3f8/64 Scope:Link UP BROADCAST RUNNING MULTICAST MTU:1500 Metric:1 RX packets:471976 errors:0 dropped:0 overruns:0 frame:0 TX packets:194066 errors:0 dropped:0 overruns:0 carrier:0 collisions:0 txqueuelen:1000 RX bytes:184958609 (176.3 MiB) TX bytes:35739546 (34.0 MiB)
Step-2 Change Host Name-
[root@server ~]# vim /etc/sysconfig/network
NETWORKING=yesHOSTNAME=server.ramesh.com
[root@server ~]# vim /etc/hosts
127.0.0.1 localhost localhost.localdomain localhost4 localhost4.localdomain4::1 localhost localhost.localdomain localhost6 localhost6.localdomain6
192.168.0.1 server.ramesh.com server
[root@server ~]# hostname server.ashu.com
Step-3 Now Install 'bind' package
[root@server ~]# yum install bind* -y
Step-4 Configure Caching-Only DNS server
[root@server ~]# cd /etc/
Step-5 Edit the named.conf file
[root@server etc]# vim named.conf______________________________________________________________________________ //// named.conf//// Provided by Red Hat bind package to configure the ISC BIND named(8) DNS// server as a caching only nameserver (as a localhost DNS resolver only).//// See /usr/share/doc/bind*/sample/ for example named configuration files.// //options { listen-on port 53 { 127.0.0.1; 192.168.0.1; }; listen-on-v6 port 53 { ::1; }; directory "/var/named"; dump-file "/var/named/data/cache_dump.db"; statistics-file "/var/named/data/named_stats.txt"; memstatistics-file "/var/named/data/named_mem_stats.txt"; allow-query { any; }; allow-transfer{ localhost; 192.168.0.2; };
## --> Note- ##--> allow-query { any; }; - Every or ##--> add particular network {192.168.0.0/24;} ##--> allow-transfer{ localhost; 192.168.0.2; }; -Slave DNS
recursion yes;
dnssec-enable yes; dnssec-validation yes; dnssec-lookaside auto;
/* Path to ISC DLV key */ bindkeys-file "/etc/named.iscdlv.key";
managed-keys-directory "/var/named/dynamic";};
logging { channel default_debug { file "data/named.run"; severity dynamic; };};
zone "." IN { type hint; file "named.ca";};
include "/etc/named.rfc1912.zones";include "/etc/named.root.key";
:wq!______________________________________________________________________________
[root@server etc]# cd
Step-6 Add the nameserver in resolve file
[root@server ~]# vim /etc/resolv.conf
search ramesh.comnameserver 192.168.0.1
[root@server ~]# /etc/init.d/NetworkManager restart
Step-7 Restart named Services-
[root@server ~]# /etc/init.d/NetworkManager restart;chkconfig named on
or
[root@server ~]# service named restart[root@server ~]# chkconfig named on
Step-8 Now Test on the other server
[root@server ~]# dig @192.168.0.1 google.com______________________________________________________________________________
; <<>> DiG 9.8.2rc1-RedHat-9.8.2-0.23.rc1.el6_5.1 <<>> @192.168.0.1 google.com
; (1 server found)
;; global options: +cmd
;; Got answer:
;; ->>HEADER<<- opcode: QUERY, status: NOERROR, id: 55804
;; flags: qr rd ra; QUERY: 1, ANSWER: 11, AUTHORITY: 13, ADDITIONAL: 2
;; QUESTION SECTION:
;google.com. IN A
;; ANSWER SECTION:
google.com. 16 IN A 173.194.36.72
google.com. 16 IN A 173.194.36.73
google.com. 16 IN A 173.194.36.78
google.com. 16 IN A 173.194.36.64
google.com. 16 IN A 173.194.36.65
google.com. 16 IN A 173.194.36.66
google.com. 16 IN A 173.194.36.67
google.com. 16 IN A 173.194.36.68
google.com. 16 IN A 173.194.36.69
google.com. 16 IN A 173.194.36.70
google.com. 16 IN A 173.194.36.71
;; AUTHORITY SECTION:
. 5805 IN NS a.root-servers.net.
. 5805 IN NS b.root-servers.net.
. 5805 IN NS c.root-servers.net.
. 5805 IN NS d.root-servers.net.
. 5805 IN NS e.root-servers.net.
. 5805 IN NS f.root-servers.net.
. 5805 IN NS g.root-servers.net.
. 5805 IN NS h.root-servers.net.
. 5805 IN NS i.root-servers.net.
. 5805 IN NS j.root-servers.net.
. 5805 IN NS k.root-servers.net.
. 5805 IN NS l.root-servers.net.
. 5805 IN NS m.root-servers.net.;; ADDITIONAL SECTION:
a.root-servers.net. 156649 IN A 198.41.0.4
a.root-servers.net. 156649 IN AAAA 2001:503:ba3e::2:30;; Query time: 0 msec;; SERVER: 192.168.0.1#53(192.168.0.1);; WHEN: Wed Mar 19 17:02:52 2014
;; MSG SIZE rcvd: 459______________________________________________________________________________
Caching Only DNS Server Configuration finished. So Enjoy............................!
System-1
Configure Primary DNS Server-
A master server has control over a specific DNS zone and is regarded as the authoritative server for address resolution of the specific zone. The master server also responds to resolution requests for this specific zone, coming in from other caching servers.
Step-1 Set Static IP..[root@server ~]# vim /etc/sysconfig/netwprk-scripts/ifcfg-eth0
DEVICE=eth0HWADDR=40:2c:29:84:6d:8cNM_CONTROLLED=noONBOOT=yesIPADDR=192.168.0.1BOOTPROTO=noneNETMASK=255.255.255.0DNS=192.168.0.1BROADCAST=210.207.201.255 TYPE=EthernetIPV6INIT=noUSERCTL=no
[root@server ~]# /etc/init.d/NetworkManager restart[root@server ~]# ifconfig eth0
eth0 Link encap:Ethernet HWaddr 40:2c:29:84:6d:8c inet addr:192.168.0.1 Bcast:210.207.201.255 Mask:255.255.255.0 inet6 addr: fe80::7627:eaff:fe0d:b3f8/64 Scope:Link UP BROADCAST RUNNING MULTICAST MTU:1500 Metric:1 RX packets:471976 errors:0 dropped:0 overruns:0 frame:0 TX packets:194066 errors:0 dropped:0 overruns:0 carrier:0 collisions:0 txqueuelen:1000 RX bytes:184958609 (176.3 MiB) TX bytes:35739546 (34.0 MiB)
Step-2 Change Host Name-
[root@server ~]# vim /etc/sysconfig/network
NETWORKING=yesHOSTNAME=server.ramesh.com
[root@server ~]# vim /etc/hosts
127.0.0.1 localhost localhost.localdomain localhost4 localhost4.localdomain4::1 localhost localhost.localdomain localhost6 localhost6.localdomain6
192.168.0.1 server.ramesh.com server
[root@server ~]# hostname server.ashu.com
Step-3 Now Install 'bind' package
[root@server ~]# yum install bind* -y
Step-4 Configure Primary DNS server
[root@server ~]# cd /etc/
Edit the named.conf file
[root@server etc]# vim named.conf______________________________________________________________________________ //// named.conf//// Provided by Red Hat bind package to configure the ISC BIND named(8) DNS// server as a caching only nameserver (as a localhost DNS resolver only).//// See /usr/share/doc/bind*/sample/ for example named configuration files.// //options { listen-on port 53 { 127.0.0.1; 192.168.0.1; }; ##-->Master DNS IP listen-on-v6 port 53 { ::1; }; directory "/var/named"; dump-file "/var/named/data/cache_dump.db"; statistics-file "/var/named/data/named_stats.txt"; memstatistics-file "/var/named/data/named_mem_stats.txt"; allow-query { localhost; 192.168.0.0/24; }; #IP Range allow-transfer{ localhost; 192.168.0.2; };
recursion yes;
dnssec-enable yes; dnssec-validation yes; dnssec-lookaside auto;
/* Path to ISC DLV key */ bindkeys-file "/etc/named.iscdlv.key";
managed-keys-directory "/var/named/dynamic";};
logging { channel default_debug { file "data/named.run"; severity dynamic; };};
zone "." IN { type hint; file "named.ca";};
zone "ashu.com" IN {
type master;
file "forward.ashu.com";
allow-update {none; };
};
zone "0.168.192.in-addr.arpa" IN {
type master;
file "reverse.ashu.com"; allow-update { none; };
};
include "/etc/named.rfc1912.zones";include "/etc/named.root.key";
:wq! ______________________________________________________________________________
[root@server etc]# cd
Step-6 Now Create forward and reverse zone file which we mention in the '/etc/named.conf'
1- Copy File..
[root@server ~]# cd /var/named/[root@server named]# ll
drwxr-x---. 6 root named 4096 Feb 19 17:59 chrootdrwxrwx---. 2 named named 4096 Jan 20 23:07 datadrwxrwx---. 2 named named 4096 Jan 20 23:07 dynamic-rw-r-----. 1 root named 1892 Feb 18 2008 named.ca-rw-r-----. 1 root named 152 Dec 15 2009 named.empty-rw-r-----. 1 root named 152 Jun 21 2007 named.localhost
-rw-r-----. 1 root named 168 Dec 15 2009 named.loopbackdrwxrwx---. 2 named named 4096 Jan 20 23:07 slaves
[root@server named]# cp -rvf named.localhost forward.ashu.com
`named.localhost' -> `forward.ramesh.com'
[root@server named]# cp -rvf named.loopback reverse.ashu.com
`named.loopback' -> `reverse.ramesh.com'
[root@server named]# lldrwxr-x---. 6 root named 4096 Feb 19 17:59 chrootdrwxrwx---. 2 named named 4096 Jan 20 23:07 datadrwxrwx---. 2 named named 4096 Jan 20 23:07 dynamic-rw-r-----. 1 root root 152 Mar 21 12:34 forward.ashu.com-rw-r-----. 1 root named 1892 Feb 18 2008 named.ca-rw-r-----. 1 root named 152 Dec 15 2009 named.empty-rw-r-----. 1 root named 152 Jun 21 2007 named.localhost-rw-r-----. 1 root named 168 Dec 15 2009 named.loopback-rw-r-----. 1 root root 168 Mar 21 12:38 reverse.ashu.comdrwxrwx---. 3 named named 4096 Mar 20 20:46 slaves
2- Change the group permission
[root@server named]# chgrp named forward.ashu.com[root@server named]# chgrp named reverse.ashu.com
[root@server named]# lldrwxr-x---. 6 root named 4096 Feb 19 17:59 chrootdrwxrwx---. 2 named named 4096 Jan 20 23:07 datadrwxrwx---. 2 named named 4096 Jan 20 23:07 dynamic-rw-r-----. 1 root named 152 Mar 21 12:34 forward.ashu.com-rw-r-----. 1 root named 1892 Feb 18 2008 named.ca-rw-r-----. 1 root named 152 Dec 15 2009 named.empty-rw-r-----. 1 root named 152 Jun 21 2007 named.localhost-rw-r-----. 1 root named 168 Dec 15 2009 named.loopback-rw-r-----. 1 root named 168 Mar 21 12:38 reverse.ashu.comdrwxrwx---. 3 named named 4096 Mar 20 20:46 slaves
3- Edit the forward zone (name to ip Addr) :
[root@server named]# vim forward.ashu.com______________________________________________________________________________
$TTL 1D
@ IN SOA @ server.ramesh.com.root.server.ashu.com. (
201421 ; serial
1D ; refresh
1H ; retry
1W ; expire
3H ) ; minimum
NS server.ramesh.com NS slave.ramesh.com
A 192.168.0.1server A 192.168.0.1slave A 192.168.0.2
:wq!______________________________________________________________________________
4- Edit the reverse zone (ip Addr to name)
[root@server named]# vim reverse.ramesh.com______________________________________________________________________________ TTL 1D
@ IN SOA @ server.ashu.com.root.server.ashu.com. (
201421 ; serial
1D ; refresh
1H ; retry
1W ; expire
3H ) ; minimum
NS server.ramesh.com NS slave.ramesh.com
A 192.168.0.1 A 192.168.0.2
1 PTR server.ramesh.com 2 PTR slave.ramesh.com
:wq! ______________________________________________________________________________
Step-7 Then Add the nameserver in resolve file
[root@server ~]# vim /etc/resolv.conf
search ramesh.comnameserver 192.168.0.1
[root@server ~]# /etc/init.d/NetworkManager restart
Step- 8 Restart the bind service....
[root@server ~]# /etc/init.d/named restart;chkconfig named on
Generating /etc/rndc.key: [ OK ]Starting named: [ OK ]
Step-9 Allow DNS Server through iptablesAdd the lines shown in bold letters in ‘/etc/sysconfig/iptables’ file. This will allow all clients to access the DNS server.
[root@server ~]# vim /etc/sysconfig/iptables
______________________________________________________________________________
# Firewall configuration written by system-config-firewall
# Manual customization of this file is not recommended.
*filter
:INPUT ACCEPT [0:0]
:FORWARD ACCEPT [0:0]
:OUTPUT ACCEPT [0:0]
-A INPUT -p udp -m state --state NEW --dport 53 -j ACCEPT
-A INPUT -p tcp -m state --state NEW --dport 53 -j ACCEPT-A INPUT -m state --state ESTABLISHED,RELATED -j ACCEPT
-A INPUT -p icmp -j ACCEPT
-A INPUT -i lo -j ACCEPT
-A INPUT -m state --state NEW -m tcp -p tcp --dport 22 -j ACCEPT
-A INPUT -j REJECT --reject-with icmp-host-prohibited
-A FORWARD -j REJECT --reject-with icmp-host-prohibited
COMMIT
___________________________________________________________________________________________
Step-10 Restart iptables to save the changes
[root@server ~]# service iptables restart
iptables: Flushing firewall rules: [ OK ]iptables: Setting chains to policy ACCEPT: filter [ OK ]iptables: Unloading modules: [ OK ]iptables: Applying firewall rules: [ OK ]
Step-11 Test syntax errors of DNS configuration and zone files
Check DNS Config file-
[root@server ~]# named-checkconf /etc/named.conf
Check zone files-
[root@server ~]# named-checkzone ramesh.com /var/named/forward.ramesh.com
zone ramesh.com/IN: loaded serial 201421OK
[root@server ~]# named-checkzone ashu.com /var/named/chroot/var/named/reverse.ashu.com
zone ramesh.com/IN: loaded serial 201421OK
Step- 16 Test DNS Server..
[root@server ~]# dig server.ramesh.com
@ forward lookup ______________________________________________________________________________
; <<>> DiG 9.7.0-P2-RedHat-9.7.0-5.P2.el6 <<>> server.ramesh.com
;; global options: +cmd
;; Got answer:
;; ->>HEADER<<- opcode: QUERY, status: NOERROR, id: 50351
;; flags: qr aa rd ra; QUERY: 1, ANSWER: 1, AUTHORITY: 1, ADDITIONAL: 0

;; QUESTION SECTION:
; server.ashu.com.           IN      A

;; ANSWER SECTION:
server.ashu.com.    86400   IN      A       192.168.0.1

;; AUTHORITY SECTION:
ashu.com.              86400   IN      NS      server.ashu.com.
;; Query time: 0 msec
;; SERVER: 192.168.0.1#53(192.168.0.1)
;; WHEN: Wed Mar 20 19:02:52 2014
;; MSG SIZE  rcvd: 45
______________________________________________________________________________
[root@server ~]# dig -x 192.168.0.1
@ reverse lookup ______________________________________________________________________________
; <<>> DiG 9.7.0-P2-RedHat-9.7.0-5.P2.el6 <<>> -x 192.168.0.1
;; global options: +cmd
;; Got answer:
;; ->>HEADER<<- opcode: QUERY, status: NOERROR, id: 45077
;; flags: qr aa rd ra; QUERY: 1, ANSWER: 1, AUTHORITY: 1, ADDITIONAL: 1

;; QUESTION SECTION:
;0.168.192.in-addr.arpa.     IN      PTR

;; ANSWER SECTION:
0.168.192.in-addr.arpa. 86400 IN     PTR     server.ramesh.com.

;; AUTHORITY SECTION:
0.168.192.in-addr.arpa. 86400  IN      NS      server.ramesh.com.

;; ADDITIONAL SECTION:server.ramesh.com.    86400   IN      A       192.168.0.1

;; Query time: 0 msec
;; SERVER: 192.168.0.1#53(192.168.0.1)
;; WHEN: Wed Mar 20 19:03:52 2014
;; MSG SIZE  rcvd: 108
______________________________________________________________________________
[root@server ~]# nslookup
@ Using nslookup command with also working in windows family______________________________________________________________________________
> server.ramesh.comServer: 192.168.0.1 Address: 192.168.0.1#53
Name: server.ramesh.comAddress: 192.168.0.1> 192.168.0.1 Server: 192.168.0.1Address: 192.168.0.1#530.168.192.in-addr.arpa name = server.ramesh.com.>______________________________________________________________________________
Primary DNS Server Configuration finished. So Enjoy............................!
System-2Configure Secondary (Slave) DNS Server-
A secondary DNS Server is used as a backup DNS Server in case the primary fails. The configuration is almost identical.
Step-1 Set Static IP..[root@slave ~]# vim /etc/sysconfig/netwprk-scripts/ifcfg-eth0
DEVICE=eth0HWADDR=40:2c:29:84:5d:7cNM_CONTROLLED=noONBOOT=yesIPADDR=192.168.0.2BOOTPROTO=noneNETMASK=255.255.255.0BROADCAST=210.207.201.255 DNS=192.168.0.1TYPE=EthernetIPV6INIT=noUSERCTL=no
[root@slave ~]# /etc/init.d/NetworkManager restart[root@slave ~]# ifconfig eth0
eth0 Link encap:Ethernet HWaddr 40:2c:29:84:5d:7c inet addr:192.168.0.2 Bcast:210.207.201.255 Mask:255.255.255.0 inet6 addr: fe80::7627:eaff:fe0d:b3f8/64 Scope:Link UP BROADCAST RUNNING MULTICAST MTU:1500 Metric:1 RX packets:471976 errors:0 dropped:0 overruns:0 frame:0 TX packets:194066 errors:0 dropped:0 overruns:0 carrier:0 collisions:0 txqueuelen:1000 RX bytes:184958609 (176.3 MiB) TX bytes:35739546 (34.0 MiB)
Step-2 Change Host Name-
[root@slave ~]# vim /etc/sysconfig/network
NETWORKING=yesHOSTNAME=slave.ramesh.com
[root@slave ~]# vim /etc/hosts
127.0.0.1 localhost localhost.localdomain localhost4 localhost4.localdomain4::1 localhost localhost.localdomain localhost6 localhost6.localdomain6
192.168.0.1 server.ashu.com server192.168.0.2 slave.ashu.com slave
[root@slave ~]# hostname slave.ramesh.com
Step-3 Now Install 'bind' package
[root@slave ~]# yum install bind* -y
Step-4 Configure Secondary (Slave) DNS server
[root@slave ~]# cd /var/etc/
Step-5 Edit the named.conf file
[root@slave etc]# vim named.conf______________________________________________________________________________ //// named.conf//// Provided by Red Hat bind package to configure the ISC BIND named(8) DNS// server as a caching only nameserver (as a localhost DNS resolver only).//// See /usr/share/doc/bind*/sample/ for example named configuration files.// //options { listen-on port 53 { 127.0.0.1; 192.168.0.2; };#Slve DNS IP listen-on-v6 port 53 { ::1; }; directory "/var/named"; dump-file "/var/named/data/cache_dump.db"; statistics-file "/var/named/data/named_stats.txt"; memstatistics-file "/var/named/data/named_mem_stats.txt"; allow-query { localhost; 192.168.0.0/24;}; # IP Range
recursion yes;
dnssec-enable yes; dnssec-validation yes; dnssec-lookaside auto;
/* Path to ISC DLV key */ bindkeys-file "/etc/named.iscdlv.key";
managed-keys-directory "/var/named/dynamic";};
logging { channel default_debug { file "data/named.run"; severity dynamic; };};
zone "." IN { type hint; file "named.ca";};
zone "ashu.com" IN {
type slave;
file "slaves/ashu.forward";
masters {192.168.0.1; };
};
zone "0.168.192.in-addr.arpa" IN {
type slave;
file "slaves/ashu.reverse"; masters {192.168.0.1; };
};
include "/etc/named.rfc1912.zones";include "/etc/named.root.key";
:wq!______________________________________________________________________________
[root@slave etc]# cd Step-6 Add the nameserver in resolve file
[root@slave ~]# vim /etc/resolv.conf
search ramesh.comnameserver 192.168.0.1nameserver 192.168.0.2
[root@slave ~]# /etc/init.d/NetworkManager restart
Step- 7 Restart the bind service....
[root@slave ~]# /etc/init.d/named restart;chkconfig named on
Generating /etc/rndc.key: [ OK ]Starting named: [ OK ]
Step-8 Allow DNS Server through iptablesAdd the lines shown in bold letters in ‘/etc/sysconfig/iptables’ file. This will allow all clients to access the DNS server.
[root@slave ~]# vim /etc/sysconfig/iptables
______________________________________________________________________________
# Firewall configuration written by system-config-firewall
# Manual customization of this file is not recommended.
*filter
:INPUT ACCEPT [0:0]
:FORWARD ACCEPT [0:0]
:OUTPUT ACCEPT [0:0]
-A INPUT -p udp -m state --state NEW --dport 53 -j ACCEPT
-A INPUT -p tcp -m state --state NEW --dport 53 -j ACCEPT-A INPUT -m state --state ESTABLISHED,RELATED -j ACCEPT
-A INPUT -p icmp -j ACCEPT
-A INPUT -i lo -j ACCEPT
-A INPUT -m state --state NEW -m tcp -p tcp --dport 22 -j ACCEPT
-A INPUT -j REJECT --reject-with icmp-host-prohibited
-A FORWARD -j REJECT --reject-with icmp-host-prohibited
COMMIT
______________________________________________________________________________
Step-9 Restart iptables to save the changes
[root@slave ~]# service iptables restart
iptables: Flushing firewall rules: [ OK ]iptables: Setting chains to policy ACCEPT: filter [ OK ]iptables: Unloading modules: [ OK ]iptables: Applying firewall rules: [ OK ]
Now the secondary DNS Server is ready. The zone files from the primary server will be automatically copied to the secondary server.To verify, goto DNS database location(i.e ‘/var/named/slaves’)
[root@slave ~]# cd /var/named/slaves/
[root@slave slaves]# ll ashu.forward ashu.reverse
[root@slave slaves]# cat ashu.forward (Check Zone file)
[root@slave slaves]# cat ashu.forward (Check Zone file) Note-
While configuring the secondary DNS Server, the following should be kept in mind -
- We don't need to define the zone files in the secondary DNS Server. It will automatically be transferred from primary DNS Server.
- While updating the zone files in the primay DNS Server, the serial number has to be updated. The secondary DNS Server will transfer zone files only if the serial number is different.
Step-9 Test slave DNS Server..
[root@slave slaves]# cd
[root@slave ~]# dig slave.ramesh.com
[root@slave ~]# diz -x 192.168.0.2
[root@slave ~]# nslookup 192.168.0.2
[root@slave ~]# nslookup slave.ashu.com
Secondary (Slave) DNS Server Configuration finished. So Enjoy............................! 

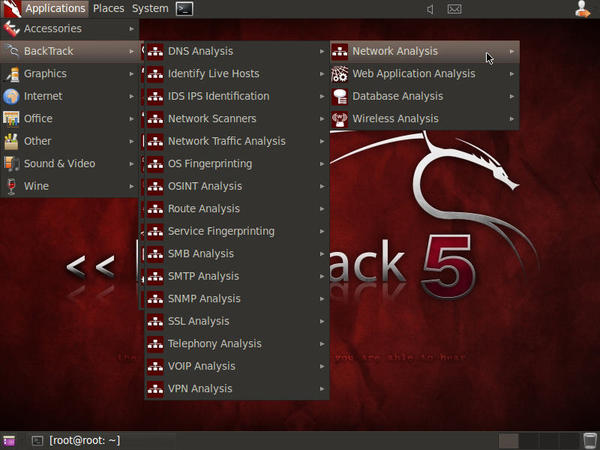 Figure 1: BackTrack->Information Gathering->Network Analysis.
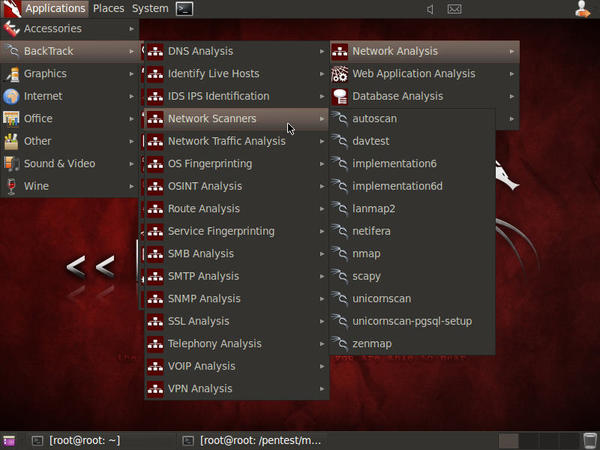 Figure 2: The list of BackTrack's Network Scanner tools.


